Quilting Circle Embroidery Design: Mastering the Art of Circular Stippling
The intersection of traditional quilting aesthetics and modern machine embroidery offers a unique canvas for creativity. Among the various techniques available, the Quilting Circle Embroidery Design stands out as a sophisticated method that mimics the hand-stitched look of classic patchwork while leveraging the precision of digital machines. This design style, often referred to as circle quilting or stippling within a circular motif, is not merely decorative; it adds texture, depth, and a professional finish to garments, home decor, and accessories. Whether you are a seasoned quilter looking to expand your digital repertoire or a beginner eager to explore machine embroidery, understanding the nuances of this technique is essential for achieving high-quality results.
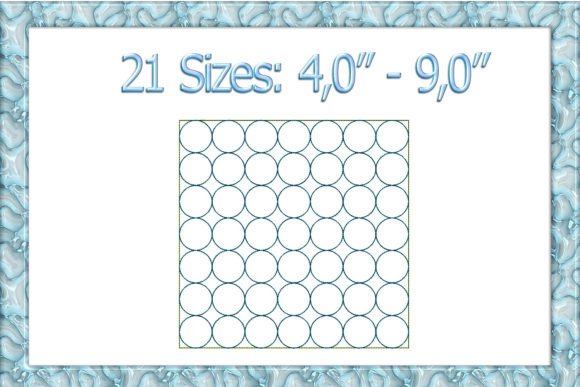
At its core, this embroidery pattern relies on dense, overlapping circular stitches that create a quilted appearance without the need for actual batting or sewing layers together in the traditional sense. The result is a textured surface that catches light beautifully, making it ideal for t-shirts, baby clothes, tote bags, and wall hangings. However, the simplicity of the visual outcome can be deceptive. Achieving a flawless "quilting" effect requires careful attention to file format compatibility, stabilizer selection, and needle choice. Many enthusiasts rush into stitching these designs only to encounter puckering, thread breaks, or uneven textures. By addressing these common pitfalls early, you can ensure that your projects meet professional standards from the first stitch to the last.
Understanding File Formats and Machine Compatibility
One of the most frequent sources of frustration for embroidery hobbyists is attempting to load an embroidery file onto a machine that does not support its specific format. When downloading a Quilting Circle Embroidery Design, it is crucial to verify that the file extension matches your machine’s capabilities. The digital embroidery landscape is fragmented, with different manufacturers using proprietary coding systems. For instance, Brother, Deco, and Babylock machines typically utilize the PES format. If you own a Tajima machine, you will need the DST file. Similarly, Melco machines require EXP files, while Husqvarna Viking and Elna models often use HUS or JEF formats respectively.
Other common formats include VP3 for older Husqvarna/Viking units, VIP XXX for newer Viking models, and SEW for Janome, Elna, and Kenmore machines. Before purchasing or downloading any design, check your user manual or the machine’s display to confirm supported extensions. Attempting to convert files manually can sometimes alter stitch density or direction, leading to suboptimal results. If you are unsure, consult with your retailer or use reputable conversion software, though native formats always yield the best quality. Remember, this is purely a digital asset—a machine-readable instruction set—not a physical patch. You must have both the hardware (the embroidery machine) and the software interface to transfer the design from your computer to the device.
Stabilizer Strategies for Different Fabrics
The success of any embroidery project, particularly those involving dense stippling like the Quilting Circle design, hinges largely on proper stabilization. A common mistake among beginners is underestimating the tension that dense stitching places on fabric. Without adequate support, the fabric will pucker, shift, or tear during the stitching process. The type of stabilizer you choose should depend on the base material you are working with.
For fine-knit fabrics, such as cotton T-shirts or children’s overalls, stability is paramount to prevent distortion. In these cases, a combination approach is often recommended. Start by applying a sticky cut-away stabilizer to the back of the fabric. This provides a permanent foundation that prevents stretching. On the top side, inside the hoop area, place a tear-away stabilizer. This temporary layer supports the fabric during stitching but can be removed afterward, leaving no residue. Additionally, if your design includes fine lines or text alongside the circles, consider using a flush-cut stabilizer on the exterior of the hoop area to further secure the edges. This multi-layered approach ensures that the fabric remains flat and taut, allowing the machine to execute precise stitches without dragging the material.
For woven fabrics like denim or canvas, a standard cut-away stabilizer is usually sufficient. However, always test your setup on a scrap piece of the same fabric before committing to the final project. This trial run allows you to adjust tension settings and observe how the fabric behaves under the needle, saving you time and materials in the long run.
Needle Selection and Thread Quality
Another overlooked detail is the choice of needle. Using the wrong needle size or type can lead to skipped stitches, broken threads, or even damage to delicate fabrics. When working with knits, a ballpoint or stretch needle is essential because it slides between the fibers rather than piercing them, preventing runs and holes. For finer gauges of knitting, opting for a thinner gauge needle, such as a size 70/10 or 75/11, can minimize visible puncture marks and maintain the integrity of the fabric’s drape.
Thread quality also plays a significant role in the final appearance. High-quality polyester or rayon threads provide better sheen and durability compared to lower-grade alternatives. Since the Quilting Circle design involves continuous movement and dense coverage, inferior thread may break frequently or appear fuzzy after washing. Ensure your machine is properly threaded and that the bobbin tension is balanced. Regular maintenance, including cleaning lint from the hook area and oiling moving parts according to the manufacturer’s instructions, will also contribute to smoother operation and fewer errors.
Evaluating Design Complexity and Application
Before diving into a new project, take time to evaluate the complexity of the Quilting Circle Embroidery Design. Some designs may feature varying stitch densities or intricate transitions that require more advanced skills. Review the design preview in your embroidery software to understand the stitch path and estimated completion time. This helps in planning your workflow and selecting appropriate materials. For example, a large circular motif on a tote bag might require a larger hoop and longer stitching time, whereas a small version on a child’s bib needs careful placement to avoid discomfort.
Furthermore, consider the end-use of the item. Garments that will undergo frequent washing benefit from sturdier stabilizers and higher-quality threads to withstand wear and tear. Home decor items, on the other hand, might allow for more creative freedom with thread colors and textures. Always prioritize functionality alongside aesthetics. By paying attention to these details, you transform a simple digital file into a polished, professional product that reflects your skill and dedication.
In summary, mastering the Quilting Circle Embroidery Design is about more than just pressing start on your machine. It involves a holistic approach that considers file compatibility, fabric stabilization, needle selection, and thoughtful application. By avoiding common mistakes and adhering to best practices, you can unlock the full potential of this versatile technique, creating beautiful, durable, and personalized items that stand out. Whether you are crafting gifts, launching a small business, or simply enjoying a creative hobby, these insights will help you navigate the world of machine embroidery with confidence and precision.