Laser Cut Project Plan Wall Clock
In the realm of modern home decor, the intersection of functionality and aesthetic appeal is where true design magic happens. A Laser Cut Project Plan Wall Clock represents more than just a timekeeping device; it is a testament to precision engineering, artistic expression, and the democratization of custom manufacturing. For DIY enthusiasts, woodworkers, and interior design aficionados alike, creating a bespoke timepiece allows for a level of personalization that mass-produced items simply cannot match. This guide explores how leveraging digital vector templates can transform raw materials into stunning focal points for any room.
The Evolution of Custom Wall Decor
Gone are the days when wall clocks were merely utilitarian objects found in hardware stores. Today, they serve as statement pieces that reflect individual taste and craftsmanship. The challenge many hobbyists face is bridging the gap between having a creative vision and possessing the technical skills to execute complex geometric designs. Traditional woodworking methods require extensive tooling knowledge and can be labor-intensive. However, the advent of accessible laser cutting technology has lowered these barriers significantly.
This is where the Laser Cut Project Plan Wall Clock template shines. By providing pre-designed, mathematically precise files, creators can focus on the joy of assembly and finishing rather than struggling with blueprints or measurements. It addresses the common pain point of "design paralysis," offering a ready-made solution that is both intricate and achievable for users of varying skill levels.
Understanding the Technology: Vector Files and Precision
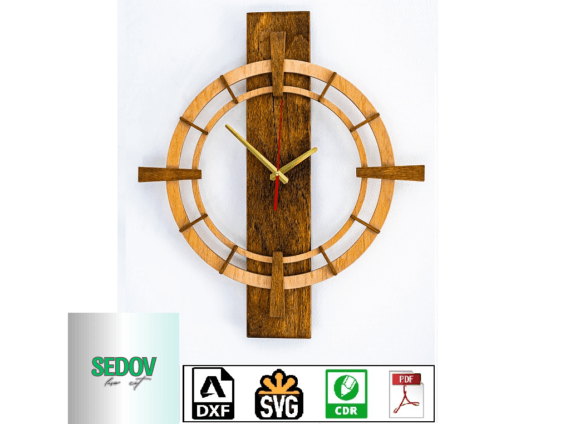
At the heart of this project lies the digital file format. The template is available in multiple industry-standard formats, including SVG (Scalable Vector Graphics), CDR (CorelDRAW), DXF (Drawing Exchange Format), and PDF (Portable Document Format). Each format serves a specific purpose depending on the software and hardware you intend to use.
- SVG: Ideal for web-based design tools and compatible with many modern laser cutters that accept vector paths directly.
- DXF: A universal CAD format widely supported by CNC routers and laser cutting machines, ensuring compatibility across different platforms.
- CDR: Specifically tailored for users working within the CorelDRAW ecosystem, preserving layer structures and editability.
- PDF: Useful for viewing dimensions and printing reference sheets, though often requires conversion to vector paths for cutting.
These vector designs are not static images; they are collections of lines and curves that define exactly where the laser beam should travel. This ensures that every curve of the clock’s face and every gear-like detail is reproduced with sub-millimeter accuracy. The result is a seamless fit between components, reducing the need for post-processing sanding or filing.
Material Selection and Preparation
One of the critical factors in achieving a professional finish with your Laser Cut Project Plan Wall Clock is material selection. The recommended material thickness for this specific design is 6 mm (approximately 1/4 inch) plywood. This thickness strikes an optimal balance between structural integrity and ease of cutting. Thinner materials may lack the rigidity needed for the clock mechanism to mount securely, while thicker woods might require slower cutting speeds, potentially leading to excessive charring on the edges.
Birch plywood is often the preferred choice due to its smooth surface, consistent grain, and minimal voids. When preparing your workspace, ensure that the wood is flat and free of warping. Before loading the material into your laser cutter, it is advisable to clean the surface to remove any dust or debris that could interfere with the beam's focus. Additionally, always perform a test cut on a scrap piece of the same material to adjust power and speed settings, ensuring clean cuts without burning through delicate details.
Assembly: From Flat Pack to Functional Art
Once the cutting process is complete, the assembly phase begins. The beauty of this template lies in its interlocking or precisely fitted components. Most parts are designed to be glued together using standard wood glue. Here is a streamlined approach to assembling your clock:
- Organization: Sort all cut pieces by size and shape. Using a numbered system or labeling the back of each piece with a pencil can prevent confusion during assembly.
- Dry Fit: Before applying any adhesive, assemble the pieces without glue to check for fit. If any parts feel tight, lightly sand the edges with fine-grit sandpaper.
- Gluing Strategy: Apply a thin, even layer of wood glue to the contact surfaces. Avoid excess glue, which can squeeze out and create messy joints that are difficult to clean up once dry.
- Clamping: Use clamps or rubber bands to hold the pieces together firmly while the glue cures. Ensure the assembly remains square and aligned throughout the drying process.
- Mechanism Installation: Once the structure is fully cured, install the quartz clock movement according to the manufacturer’s instructions. Typically, this involves inserting the shaft through the center hole and securing it with a provided nut or washer.
Practical Applications and Design Variations
The versatility of the Laser Cut Project Plan Wall Clock allows for various applications beyond standard home decor. In commercial spaces such as cafes, co-working offices, or boutique retail stores, these clocks add a touch of industrial chic and artisanal quality. They signal attention to detail and an appreciation for craft, enhancing the overall brand experience.
For educators and makerspaces, this project serves as an excellent introduction to digital fabrication. Students can learn about vector graphics, material properties, and mechanical assembly while creating a functional object. The ability to customize the design—by changing colors, adding personal initials, or selecting different wood stains—makes it a highly engaging educational tool.
Tips for Different User Approaches
Beginners might prefer starting with the PDF version to visualize the final product and practice tracing if they do not have immediate access to a laser cutter. Alternatively, they can order the cut files from a local service bureau, allowing them to focus entirely on assembly and finishing.
Experienced Makers may choose to experiment with mixed materials. Combining plywood with acrylic inserts or metal accents can create a striking contrast. The precision of the Laser Cut Project Plan Wall Clock design ensures that even multi-material assemblies align perfectly, provided the thicknesses are accounted for in the design adjustments.
Final Considerations for a Stunning Result
To truly elevate your creation, consider the finishing touches. After assembly, a light sanding of the entire surface will remove any minor burn marks from the laser cutting process. Applying a natural oil finish, such as tung oil or linseed oil, will enhance the wood grain and provide protection against humidity changes. For a modern look, a matte clear coat spray can offer durability without altering the wood’s appearance.
Remember to unzip the folder containing your product files before beginning. The archive typically contains separate layers for cutting and engraving, along with instruction manuals. Taking the time to understand the layer structure will save you hours of troubleshooting later. By following these guidelines, you transform a simple concept into a lasting piece of art. The Laser Cut Project Plan Wall Clock is not just about telling time; it is about celebrating the process of making, the beauty of precision, and the satisfaction of bringing a digital idea into the physical world.